You can use your smartphone as a live video source for streaming and capture. Both iPhone and Android devices can connect to a computer and function as an external webcam, either wirelessly or through a USB cable.
This allows you to use your phone's camera for live streaming without needing a dedicated webcam or additional video camera hardware.
Supported Configurations
| Phone | Computer | Connection | Status |
|---|---|---|---|
| iPhone | Mac | Wireless or USB | Supported |
| iPhone | Windows PC | USB or wireless (with Camo) | Supported with Camo |
| Android 14+ | Windows PC | Wireless or USB | Supported |
Note: For Android devices, Android 14 or newer is recommended. Newer phones generally provide better compatibility with built-in webcam functionality.
iPhone + Mac
Apple provides built-in functionality that allows an iPhone to act as a webcam for a Mac.
Requirements:
An iPhone 13 or newer is recommended based on tested configurations.
A compatible Mac.
Both devices should have Wi-Fi and Bluetooth enabled.
Both devices should be signed in to the same Apple Account.
Wireless setup:
Place your iPhone near your Mac.
Make sure Wi-Fi and Bluetooth are enabled on both devices.
Connect the devices using the same Apple Account.
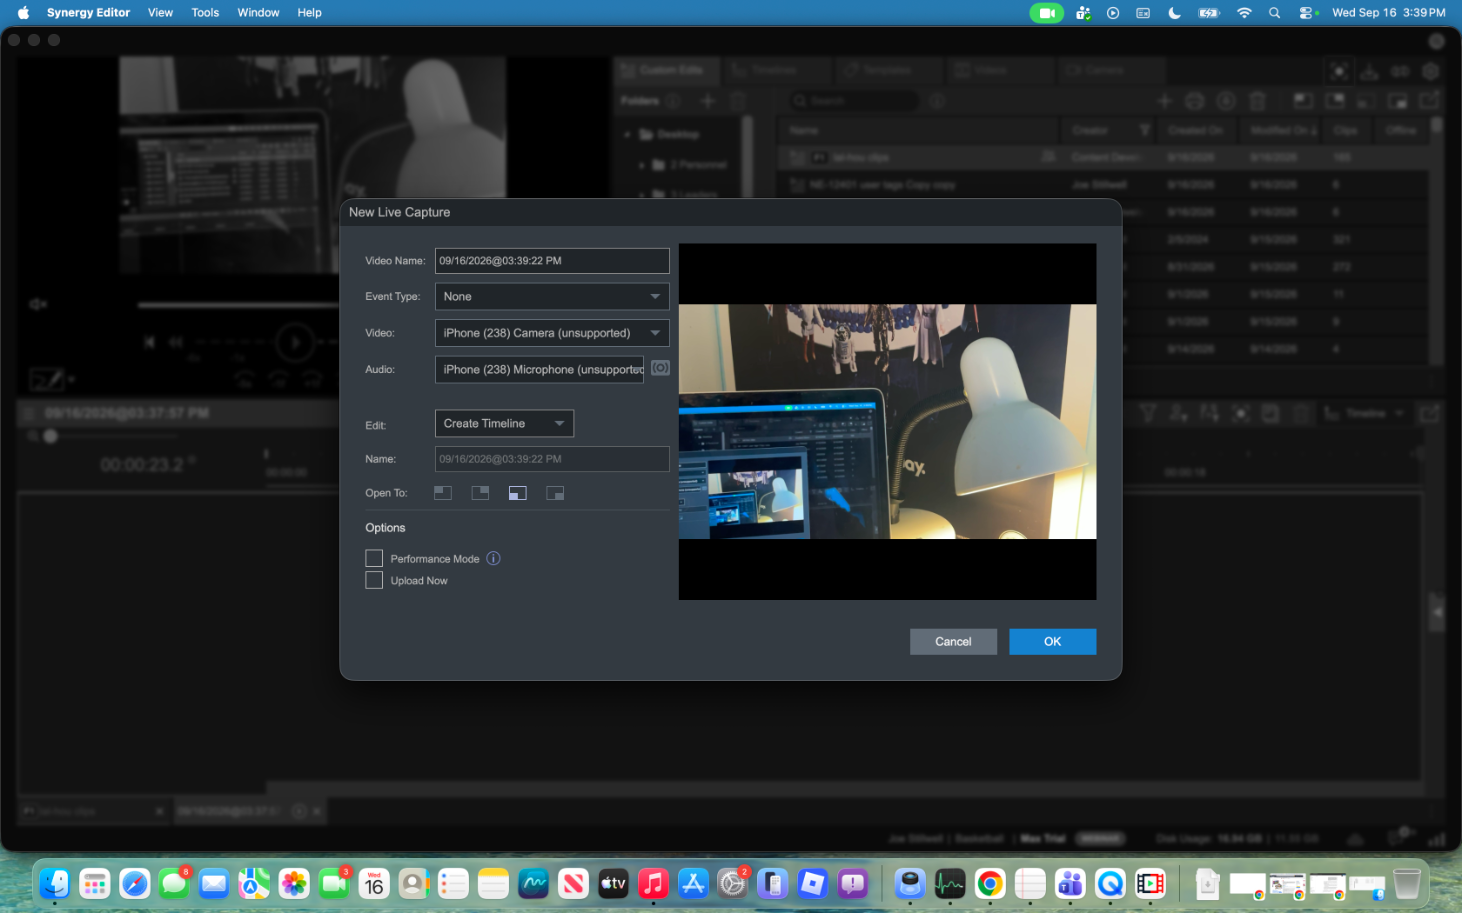
Open the Synergy Editor and click the New Live Capture button.
Select your iPhone as the camera source.
USB setup:
Connect your iPhone to your Mac using a USB cable.
Unlock your iPhone and approve any connection prompts.
Open the Synergy Editor and click the New Live Capture button.
Select your iPhone as the camera source.
iPhone + Windows PC
Windows does not provide the same native iPhone webcam integration as macOS. However, you can use third-party software to bridge the connection.
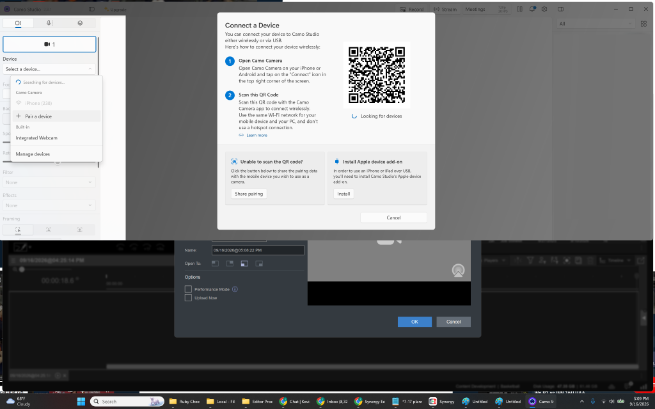
Recommended software: Camo
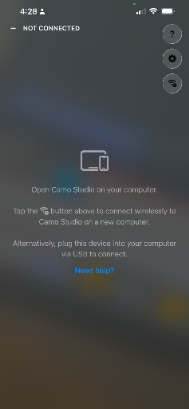
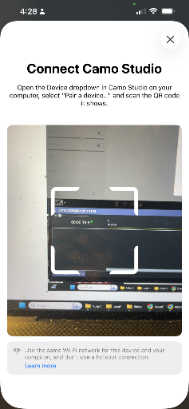
Install Camo on your iPhone.
Install the corresponding Camo software on your Windows PC.
Connect your iPhone to your PC using a USB cable or wireless connection.
Follow the Camo setup instructions to establish the connection.
Open the Synergy Editor and click the New Live Capture button.
Select the Camo camera source.
Camo acts as an intermediary, exposing your phone's camera to Windows as a webcam source. This allows it to be selected by compatible streaming and capture applications.
Android + Windows PC
Android 14 and newer devices can support webcam functionality through their built-in USB webcam capabilities.
Windows also provides wireless integration through Microsoft Phone Link.
Option A: Wireless connection using Phone Link
On your Android phone, install or open Link to Windows.
On your Windows PC, install or open Phone Link (often already installed).
Follow the on-screen instructions to pair your phone and computer.
Complete the connection and permissions setup.
Open the Synergy Editor and click the New Live Capture button.
Select the available phone camera source, if exposed by your Windows configuration.
Option B: USB connection
Connect your Android phone to your Windows PC using a USB cable.
Unlock your phone.
Select the USB webcam option if prompted.
Allow the computer to recognize the phone as a camera device.
Open the Synergy Editor and click the New Live Capture button.
Select the phone as your video source.
Android 14+ devices with compatible hardware and software should support USB webcam functionality without requiring additional third-party camera software.
Android + Mac
Android-to-Mac webcam connectivity is less straightforward than the other configurations.
Android 14+ includes native USB webcam functionality, but compatibility and recognition can vary depending on the Mac, phone, and capture application.
We recommend testing the connection with your specific devices before relying on this configuration for a live production.
Connection Considerations and Troubleshooting
Wired vs. Wireless
Both wired and wireless connections can be used for live streaming.
USB connection:
Provides a direct connection between the phone and computer.
Is a good starting point when configuring a new device.
Avoids potential wireless connectivity interruptions.
Wireless connection:
Provides greater flexibility in phone placement.
Eliminates the need for a physical cable during capture.
Requires a stable wireless connection.
Switching from USB to Wireless on Mac
In some Mac configurations, the initial wireless connection may not establish automatically.
If this happens:
Connect the iPhone to the Mac using a USB cable.
Confirm that the phone is recognized as a camera.
Establish the initial connection.
Switch to wireless connectivity.
Known limitation: Switching from a wired connection to wireless during an active capture may cause a brief interruption in the video feed. The connection should recover automatically, but we recommend testing this transition before beginning a live production.
General Troubleshooting
If your phone is not appearing as a camera source:
Confirm that the phone is unlocked.
Check that the required software is installed and running.
Verify that the phone and computer have the necessary permissions.
Try connecting with a USB cable first.
Confirm that your operating system and phone software are up to date.
Close and reopen your streaming or capture application after establishing the connection.
Recommendations for Live Productions
For the most reliable experience:
Test your phone and computer combination before the scheduled production.
Use a USB connection when reliability is more important than mobility.
If using wireless connectivity, ensure you have a strong and stable network connection.
Avoid switching between wired and wireless connections during an active capture.
Keep your phone connected to power during extended streaming sessions.
Perform a test recording or live capture to verify video quality and connection stability.
Need help with your setup?
If you experience compatibility issues, please provide your phone model, operating system version, computer type (Mac or Windows), and preferred connection method so support can help troubleshoot your configuration.
Was this article helpful?
That’s Great!
Thank you for your feedback
Sorry! We couldn't be helpful
Thank you for your feedback
Feedback sent
We appreciate your effort and will try to fix the article